Because certain users have issues with the mailto: element, we need to create a form that will email to the desired recipient. The form should open up in any browser, unlike the mailto statement. So any place you want to place an element to contact via email, create and use a webform.
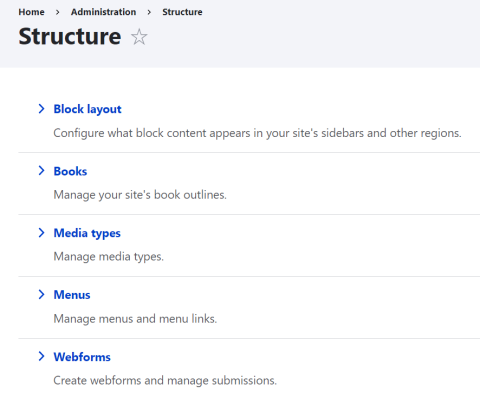
Creating a webform is straightforward, but certain elements need to be input correctly or the form will not work as desired. The first step is to go to structure/webforms from any ID web page.
Once you go to structure you need to choose webforms from the menu:
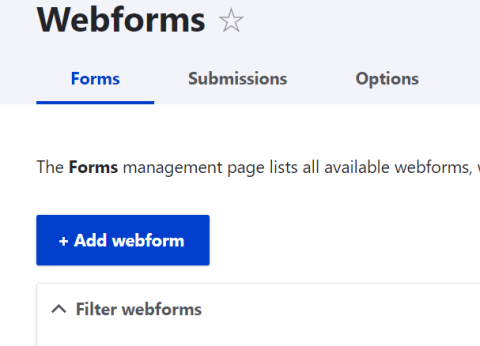
This will give you a list of all the created forms and the +Add webform button. If you ever need to edit an existing webform you will find it here. Choose Build from the right dropdown menu for the desired form. For this though we will click the add webform button to create a new form.
Filling in a new form for email
When you create a new form, you will first get a pop-up window asking for Title (required) and Category. For the title, start the title with Contact. The reason we have to do this is that, at the moment, the filter by Category is not working. There are a lot of forms, and this will allow us to find any email forms more quickly. But, for when the filter starts working properly, choose Mail to Forms from the Category drop-down.
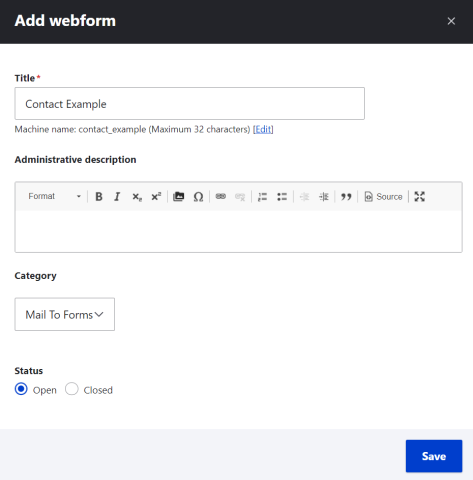
Click the Save button to create the new form.
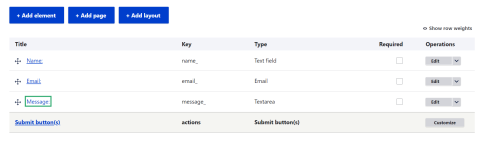
As soon as you do, you will go to the Elements page for the new form. This is where you add all the elements for the user to fill out. Three new elements should always be added. The first two are Name, and Email Address, which we need just in case the correct email is not auto-filled later. The third element is where the message is to be entered.
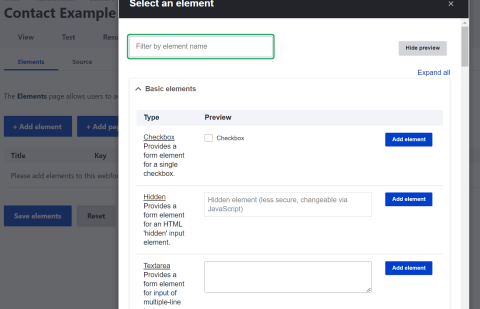
Once you click the Add element button, you will get a Select an element dialog box. This well allow you to choose the correct input format for that element.
The Name field requires a Text field which is a single-line entry box. The Message field uses Textarea, which has the ability to get many lines. Both of which are in the Basic Elements section at the top of the pop-up. For the Email field, scroll down into the advanced section and choose Email. Depending on what is needed, you may have to add additional elements, such as a Text field for the subject.
Once you have entered in all the fields, you will get a list of everything so you can double-check.
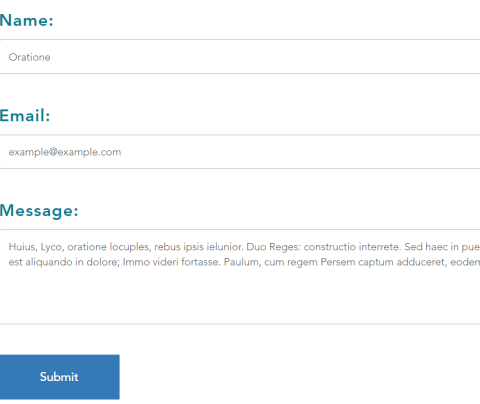
The above elements will look like this in the form:
The Settings values
Once you have entered all of the elements to be shown in the form, you must go to the Settings tab, to the right of the Build tab which you are in, to make sure the email is sent correctly.
In the settings submenu, you will need to goto the Emails/Handlers tab.

Email Handlers
When you get to the '/Settings/Email and Handlers' section click on the +Add email button. An Add Email handler form will open up. Under General Settings the title will default to Email, but you can change it to add the recipient of the mail. You don't have to, but it will make things easier if you or someone else ever has to go back.
Under 'Send to' go to the drop-down for 'To email'. You will have the following options:
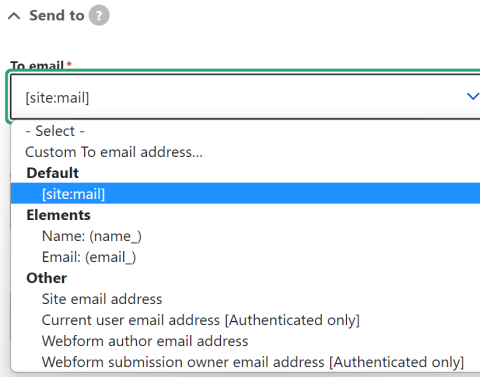
Choose the 'Custom To email address...' and put the email of the person that you want to receive the information. Do the same for CC and BCC if needed. This is useful if there are multiple people who may respond to an inquiry.
From the 'Send from' drop-down, you want to choose from the 'Elements' section. It is the same drop-down as shown above.
The 'Elements' are the values that were asked for in the form. The reason we ask for the name and email of the person submitting the form is that every once in a while, depending on the setup of the user's browser or location, we have incorrect information sent automatically. The 'Reply-to email' should be 'Current user email address [Authenticated only]. This will allow our person responding to the inquiry to just reply to the email they receive. But if the email is one of the mis-labled ones, we can just copy the email supplied in the elements section to reply.
When you finish adding emails and you go to the 'Emails/Handlers' tab you should see the following summary:
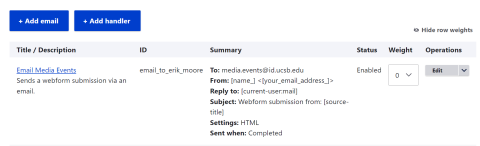
This also allows you to quickly check where the form is being sent. So if you ever have to troubleshoot because someone is not getting the emails, check here first.
Embedding the form
Once you complete the form, it will stretch from edge to edge in the browser. This does not look good. So to fix this, the form must be embedded into a page with a width of 10.
Create a new page by adding content from the Content area. Choose the Basic Page option. Add a new column in the existing page and choose Form.
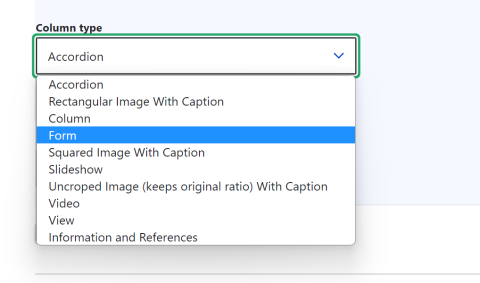
You will certain options for the form. Set the width to 10 and choose the contact form you want to insert:
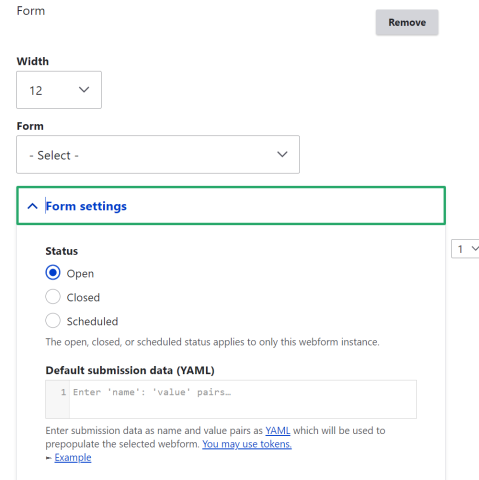
All of the forms that have been created for the site will show up in the drop-down menu. This is another reason to add the contact name in the title when creating a new contact form.
If the form is only available for certain times, e.g. the Nomination Form, you can either manually select Open or Closed or you can schedule the times it will be open. Once saved, you will be able to add the link to the page directly to where you want the email form to show.
Example: Email Example